My Photo Editing Workflow

There’s so much more to photography than capturing the moment. On the front end, there’s conceptualizing and planning a shoot, which often involves various moving parts. There’s the feat of getting out the door and making your vision happen. Then there’s the involved and time-consuming process of backing up, editing, resizing, exporting, and delivering your images—also known as a photo editing workflow.
After years of trial and error, developing my own systems, and learning from other photographers, the back end of photography has become far more fun and manageable. Here are the steps I go through to back up, organize, and deliver my images.
Note: I shoot with the Canon EOS 90D and edit with Adobe Bridge and Lightroom (sometimes Photoshop). I use Dropbox to backup edited images and deliver to clients. I am not sponsored by any of these brands.
1. Back Up Raw Images
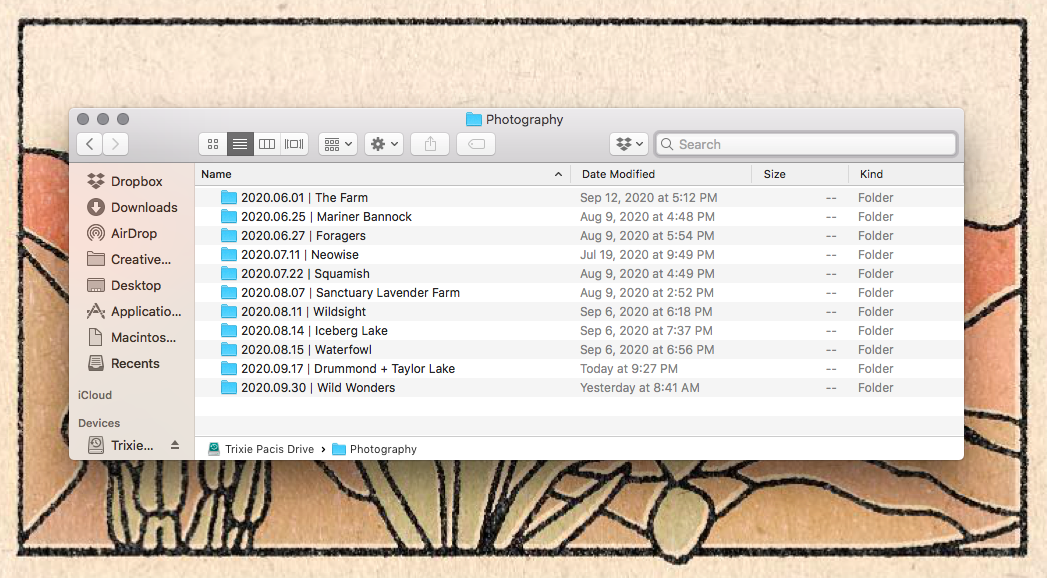
I usually back up my images after each day of shooting. I create a master folder in my external hard drive and label it by date and shoot or location name. Using this format: YYYY.MM.DD | Location or Shoot Name helps me keep folders organized. Next, I copy the entire DCIM (Digital Camera Images) folder from my memory card into that new folder on the external drive and label it RAW. I always shoot RAW and wish I started doing this much sooner!
For client deliverables and film set stills, I repeat this process from scratch using a separate hard drive (or Dropbox folder) so that I have a backup of my backup should anything go awry. For the best results, always copy from the original source (memory card) rather than copying form Backup 1 to Backup 2 because to avoid copying any errors that may have occurred with the first backup.
2. Make Selections
I always snap way more images than I ever use. In many cases, I’ll have multiple variations of a shot, with barely discernable differences. While I try to delete anything I know I won’t need in the field, I often save this task for when I’m not in a rush and can review the images with fresh eyes.
I use Adobe Bridge to pare down my folder of images into a selection that I will edit then deliver. I open the folder of images I created in Step 1 and go through them systematically and add stars to the images I want. Sometimes, I assign other star ratings to images I might want to use later. I then use the filter to view all of the 5-star images and review my selection.
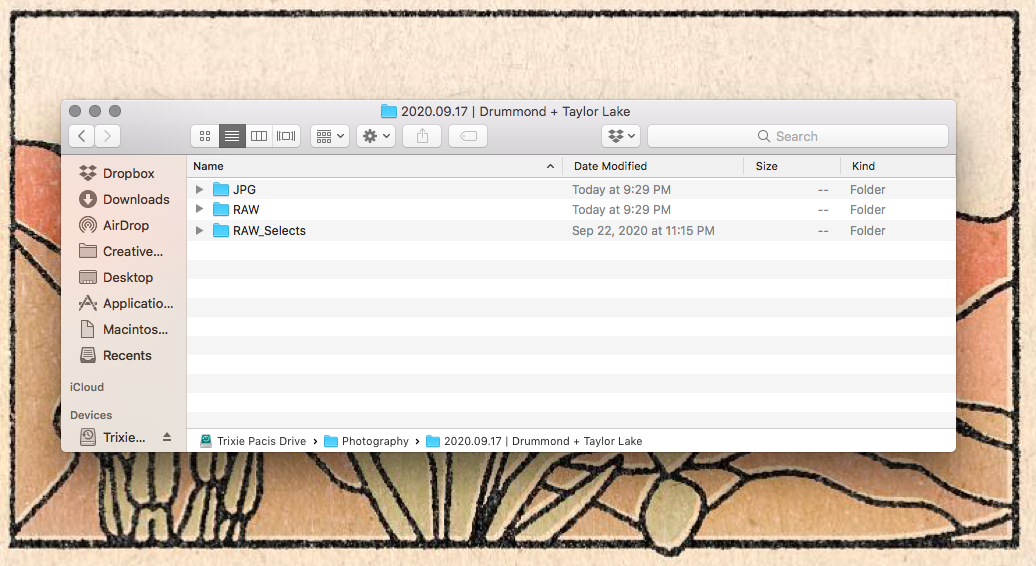
To complete this step, I go back to the master folder for the shoot located on my hard drive. I create a new folder called RAW SELECTS beside the RAW folder. I then highlight (⌘ + A) all the 5-star images in Bridge then drag and drop them into my RAW SELECTS folder. Et voila — they are ready to go whenever I’m ready to edit.

A minimalist approach to making selections can increase efficiency to other aspects of your photo editing workflow.
3. Edit in Lightroom + Export
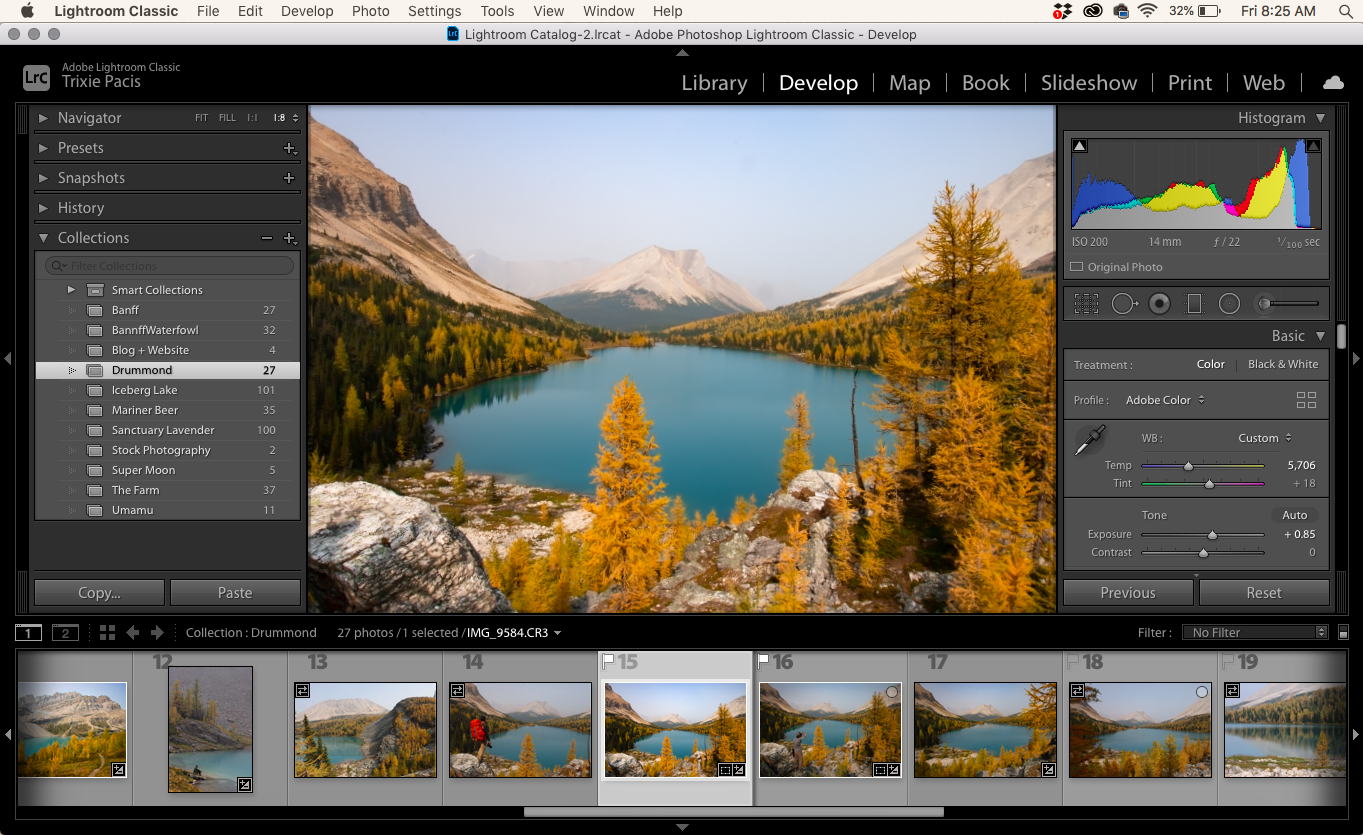
When I’m ready to edit my images, I will import the images in my RAW SELECTS folder into Lightroom (I Add them instead of Copy or Move). I’ll move from the Library to the Develop tab then working my way down the editing toolbar in pretty much the order in which they are arranged.
If needed, I bring the file into Photoshop for further edits.
When I’m happy with all of the images, I create a third folder inside the master folder labelled JPGs. I then export all of the images as JPGs to that folder, sizing according to my needs or the terms of the deliverables. For quality prints, I make sure to export at 300 DPI. For images that will be used on social media, I make the long edge a minimum of 1080 pixels. More size + dimension information can be found here.
4. Deliver Images & Format Memory Card
I use Dropbox to deliver images because it doubles as a backup. It also makes it easy to access edited files (the only ones I generally need to access again once the editing process is done). WeTransfer also comes in handy from time to time.
Only once my images are backed up in two places, I am ready to clear my memory card. Rather than deleting the images, I slot it back into my camera and Format it. This wipes and refreshes the memory card, reducing the chance of bugs or errors. I’ve left home without all my gear except a memory card at the worst times and because of that, I always try to do this step as soon as possible after a shoot. I also work with three rotating memory cards so that I always have a blank formatted card at the ready.
Overall, this photo editing workflow has ensured that all of my digital files are organized and easily accessible. I always know exactly where to find a given file and can pull it up quickly. There’s no doubt that I’ll continue to refine this system but it has served me well so far. I hope it does the same for you!